
Collatz Conjecture: A Simple yet Elusive Mathematical Problem

Collatz Conjecture: A Simple yet Elusive Mathematical Problem

The Collatz conjecture (also known as the 3n+1 problem) is one of the most famous unsolved problems in mathematics. It is deceptively simple: take any positive integer n. If n is even, divide it by 2. If n is odd, multiply it by 3 and add 1. Repeat. The conjecture states that no matter what starting number you choose, you will always eventually reach the cycle 4, 2, 1. Despite being tested for all numbers up to 2^68 (about 295 quintillion), no one has proven it works for every positive integer.

Implementing the Collatz Sequence in Python

Generating Collatz sequences is a straightforward programming exercise that teaches while loops, conditional logic, and sequence generation. The sequence length (total stopping time) varies dramatically between numbers—some reach 1 in a few steps, while others take hundreds. The maximum value reached (the hailstone peak) can be astronomically larger than the starting number, exceeding 2^100,000 for starting values around 10^9. This unpredictable growth is why the problem is so hard to prove—the sequence can explode far beyond the starting value before eventually descending to 1.

def collatz_sequence(n: int) -> list[int]:
    seq = [n]
    while n != 1:
        if n % 2 == 0:
            n //= 2
        else:
            n = 3 * n + 1
        seq.append(n)
    return seq

def collatz_stats(n: int) -> dict:
    seq = collatz_sequence(n)
    return {
        "start": n, "steps": len(seq) - 1,
        "max_value": max(seq), "max_log10": max(len(str(max(seq))), 1)
    }

for start in [7, 27, 97, 871, 6171]:
    stats = collatz_stats(start)
    print(f"n={stats['start']:>5}: {stats['steps']:>3} steps, "
          f"peak={stats['max_value']:>15,} ({stats['max_log10']} digits)")

Visualizing the Sequence

Plotting Collatz sequences reveals the characteristic “hailstone” pattern—sharp rises when odd numbers trigger 3n+1 (which is always even after adding 1), followed by a series of divisions by 2. The sequence often spends most of its time in the descent phase. A logarithmic scale helps visualize both the small values near 1 and the huge peaks at intermediate steps. The 3n+1 operation always produces an even number (since 3n is odd for odd n, 3n+1 is even), so the next step is always a division by 2, preventing consecutive odd operations.

import matplotlib.pyplot as plt

def plot_collatz(start, ax):
    seq = collatz_sequence(start)
    ax.plot(seq, marker='o', markersize=2, linewidth=0.5)
    ax.set_yscale('log')
    ax.set_title(f"Collatz: n={start}, steps={len(seq)-1}")
    ax.set_xlabel("Step")
    ax.set_ylabel("Value (log scale)")

fig, axes = plt.subplots(2, 2, figsize=(12, 8))
for i, n in enumerate([27, 41, 97, 77031]):
    plot_collatz(n, axes[i//2, i%2])
plt.tight_layout()
plt.savefig("collatz.png")

Computational Explorations

The conjecture has been verified for all n up to 2^68 using distributed computing (the BOINC-based Collatz Conjecture project). Interesting patterns emerge: numbers of the form 2^k collapse immediately to 1 (no odd steps). Numbers near 2^k often have very long sequences. The longest sequences for a given range follow no obvious pattern—there is no formula to predict the stopping time. The conjecture is related to several other open problems: the existence of a non-trivial cycle (other than 4-2-1), the possibility of a sequence that diverges to infinity, and the density of numbers that reach 1. Mathematicians like Terence Tao have made partial progress (proving that “almost all” Collatz sequences eventually reach a value below the starting point), but a complete proof remains elusive.

# Find the number with the longest sequence in a range
def find_longest(limit: int):
    longest = (0, 0, 0)  # (n, steps, max_value)
    for n in range(1, limit + 1):
        stats = collatz_stats(n)
        if stats["steps"] > longest[1]:
            longest = (n, stats["steps"], stats["max_value"])
    return longest

n, steps, peak = find_longest(100000)
print(f"Longest under 100K: n={n}, steps={steps}, peak digits={len(str(peak))}")

The Collatz conjecture’s simplicity combined with its resistance to proof makes it a favorite in recreational mathematics. It teaches that simple rules can produce complex, unpredictable behavior—a theme that appears throughout computer science in cellular automata, chaos theory, and generative art. The conjecture also demonstrates the limits of empirical verification in mathematics: no amount of computational testing can substitute for a proof.

Generalizations and Variants of the Conjecture

Mathematicians have studied several variants of the Collatz conjecture. The 3n+1 problem is one instance of a family of Collatz-like functions. The 5n+1 variant is known to have divergent trajectories (never reaching 1) and additional cycles beyond 4-2-1. The negative Collatz (applied to negative integers) has three known cycles: -1, -2, -1; -5, -14, -7, -20, -10, -5; and a 18-length cycle starting at -17. The generalized Collatz problem (mapping integers based on residue classes modulo p) is formally undecidable—John Conway proved in 1972 that there exist Collatz-like functions for which it is algorithmically impossible to determine whether all inputs eventually reach a cycle.
Test-Driven Development in Practice

Test-Driven Development in Practice

Test-Driven Development (TDD) is a software development practice where you write tests before you write the production code. The cycle is simple but transformative: Red — write a failing test, Green — write the minimal code to make it pass, Refactor — clean up both the test and production code without changing behavior. This Red-Green-Refactor loop typically runs every few minutes, producing a steady cadence of small, validated increments. TDD leads to better-designed code, comprehensive test coverage, and a reliable safety net for refactoring.

The Red-Green-Refactor Cycle

Start by writing a test that describes the next behavior you want your code to have. The test should call an interface that does not exist yet (a function you have not written, a class you have not defined). Run the test — it fails (red), which confirms that the test is actually testing something. Now write the simplest possible production code to make the test pass. Do not worry about elegance or completeness — just make the test green. Once it passes (green), step back and refactor: remove duplication, rename variables, extract helper functions, improve the design. The tests stay green throughout refactoring because you are only changing structure, not behavior. Then start the next cycle with a new failing test.

import pytest
from calculator import Calculator

# Step 1: Write a failing test (RED)
def test_addition():
    calc = Calculator()
    result = calc.add(2, 3)
    assert result == 5

# Run: pytest -> FAILS because Calculator does not exist yet

# Step 2: Write minimal code to pass (GREEN)
class Calculator:
    def add(self, a, b):
        return a + b

# Run: pytest -> PASSES

Writing Testable Code

TDD naturally pushes you toward decoupled, testable code. When a test is hard to write, that is a signal that your design has problems — tight coupling, hidden dependencies, or unclear responsibilities. For example, if a function reads from a database or calls an external API, testing it directly would require setting up a real database connection or network access. Instead, inject dependencies as parameters so they can be replaced with test doubles (mocks, stubs, or fakes) during testing.

# Untestable — hard-coded dependency
def send_welcome_email(user_id):
    user = database.query(f"SELECT * FROM users WHERE id = {user_id}")
    smtp.send(user.email, "Welcome!", "Thanks for signing up!")

# Testable — dependency injection
def send_welcome_email(user_id, db, mailer):
    user = db.get_user(user_id)
    mailer.send(user.email, "Welcome!", "Thanks for signing up!")

# Now the test can pass in mocks
from unittest.mock import MagicMock

def test_send_welcome_email():
    mock_db = MagicMock()
    mock_db.get_user.return_value = type('User', (), {'email': 'test@example.com'})()
    mock_mailer = MagicMock()
    send_welcome_email(1, mock_db, mock_mailer)
    mock_mailer.send.assert_called_once_with(
        "test@example.com", "Welcome!", "Thanks for signing up!"
    )

Testing Edge Cases

Good tests cover not just the happy path but also edge cases — empty inputs, negative numbers, boundary values, nulls, duplicates, and error conditions. Each edge case should be a separate test with a descriptive name so that when a test fails, you immediately know what scenario broke. Parametrized tests let you run the same test logic with multiple inputs without duplicating code.

# Edge case tests for a divide function
def test_divide_positive():
    assert divide(10, 2) == 5

def test_divide_by_zero():
    with pytest.raises(ValueError, match="Cannot divide by zero"):
        divide(10, 0)

@pytest.mark.parametrize("a, b, expected", [
    (10, 2, 5), (0, 5, 0), (-6, 3, -2), (7, 3, 7/3),
])
def test_divide_parametrized(a, b, expected):
    assert divide(a, b) == expected

Test Fixtures and Setup

Fixtures handle repeated setup and teardown logic. In pytest, fixtures are functions decorated with @pytest.fixture that return objects or data needed by tests. Pytest manages fixture lifecycle — session-scoped fixtures are created once per test run, module-scoped once per module, and function-scoped (the default) for each test. Use fixtures to create test databases, load sample data, set up configuration, or instantiate complex objects.

import pytest, tempfile, os

@pytest.fixture
def calculator():
    return Calculator()

@pytest.fixture
def temp_data_file():
    with tempfile.NamedTemporaryFile(mode='w', suffix='.csv', delete=False) as f:
        f.write("name,age\nAlice,30\nBob,25\n")
        path = f.name
    yield path
    os.unlink(path)

def test_calculator_add(calculator):
    assert calculator.add(2, 3) == 5

def test_load_csv(temp_data_file):
    data = load_csv(temp_data_file)
    assert len(data) == 2

Mocking External Dependencies

When your code interacts with external services (APIs, databases, file systems), mocking lets you test the behavior without the real dependency. Python’s unittest.mock library provides Mock and patch for replacing objects during testing. Use patch as a context manager or decorator to temporarily replace a function or class with a mock that records how it was called and returns configured values.

from unittest.mock import patch

@patch('myapp.mailer.send')
def test_registration_sends_email(mock_send):
    register_user("alice@example.com")
    mock_send.assert_called_once()

# Mocking external API calls
from unittest.mock import MagicMock

@patch('requests.get')
def test_fetch_user(mock_get):
    mock_response = MagicMock()
    mock_response.json.return_value = {"id": 1, "name": "Alice"}
    mock_response.status_code = 200
    mock_get.return_value = mock_response
    result = fetch_user(1)
    assert result["name"] == "Alice"

TDD is a discipline that takes practice. The first few weeks feel slower because you are writing tests before code, but the speed compounds quickly — you spend far less time manually testing, debugging regressions, and fixing bugs that reach production. Teams that adopt TDD consistently report higher code quality, fewer production incidents, and greater confidence when refactoring or adding features.

Technical SEO: Core Web Vitals and Performance

Technical SEO: Core Web Vitals and Performance

Core Web Vitals are a set of real-world metrics that Google uses to measure user experience on the web. They directly impact search rankings, so optimizing them is essential for any website. The three metrics are Largest Contentful Paint (LCP), First Input Delay (FID), and Cumulative Layout Shift (CLS). This article explains each metric in detail and shows you how to optimize for them.

Largest Contentful Paint (LCP)

LCP measures how long it takes for the largest visible element (usually a hero image, heading, or video) to render on screen. Google’s threshold is 2.5 seconds. A slow LCP makes a site feel sluggish and increases bounce rates. The most common causes of slow LCP are render-blocking resources (CSS, JavaScript), unoptimized images, and slow server response times. To improve LCP, preload your hero image so the browser discovers it early, use responsive image sizes with srcset, serve images in modern formats like WebP or AVIF, and minimize CSS and JavaScript that block the critical rendering path. Server-side improvements like using a CDN and enabling HTTP/2 can also cut LCP significantly.

<!-- Preload the hero image for faster LCP -->
<link rel="preload" href="hero.webp" as="image">

<!-- Responsive images with modern format -->
<img src="hero.webp"
     srcset="hero-400.webp 400w, hero-800.webp 800w, hero-1200.webp 1200w"
     sizes="(max-width: 600px) 400px, (max-width: 1200px) 800px, 1200px"
     width="1200" height="600"
     loading="lazy" decoding="async"
     alt="Hero image showcasing the product">

The loading="lazy" attribute defers loading of off-screen images, but the hero image should not use lazy loading — it should load eagerly since it is the largest element. The decoding="async" attribute allows the browser to decode the image off the main thread. Always set explicit width and height attributes to prevent layout shifts as images load, and also to improve CLS. The srcset attribute with sizes tells the browser which image size to download based on the viewport width, saving bandwidth on mobile devices while delivering sharp images on retina displays.

First Input Delay (FID)

FID measures the time between when a user first interacts with your site (clicking a button, tapping a link) and when the browser can actually respond to that interaction. Google’s threshold is 100 milliseconds. FID is primarily affected by heavy JavaScript execution on the main thread. If the browser is busy parsing, compiling, or executing a large script, user interactions will lag. To reduce FID, break up long JavaScript tasks (over 50 ms) using techniques like code splitting, deferring non-critical scripts with defer or async, and lazy-loading third-party scripts. Web workers can also move heavy computation off the main thread entirely.

<!-- Defer non-critical JavaScript -->
<script src="analytics.js" defer></script>

<!-- Code splitting with dynamic imports (JavaScript) -->
button.addEventListener('click', async () => {
    const { showModal } = await import('./modal.js');
    showModal();
});

The defer attribute ensures the script executes after the HTML is fully parsed, in document order, but before the DOMContentLoaded event. This prevents render-blocking while still preserving execution order. Dynamic import() splits your bundle so that heavy components (modals, charts, editors) are only loaded when the user actually needs them rather than on initial page load.

Cumulative Layout Shift (CLS)

CLS measures visual stability by tracking unexpected layout shifts during the page’s lifetime. Google’s threshold is a score of 0.1. A layout shift occurs when a visible element changes position between two frames — for example, when an image loads without dimensions and pushes content down, or when a late-loading ad banner inserts itself at the top of the page. Each shift is scored based on the fraction of the viewport that moved and the distance moved. To keep CLS low, always set explicit dimensions on images, videos, and iframes. Reserve space for dynamic content like ads or embeds using placeholder containers with a fixed aspect ratio. Avoid inserting content above existing content unless it is in response to a user interaction.

<!-- Reserve space for a dynamic ad slot -->
<div id="ad-slot" style="width: 300px; height: 250px;"></div>

<!-- Aspect ratio container for an embedded video -->
<div style="aspect-ratio: 16/9; max-width: 560px;">
    <iframe src="https://www.youtube.com/embed/dQw4w9WgXcQ"
            width="560" height="315"
            style="width: 100%; height: 100%;"></iframe>
</div>

The CSS aspect-ratio property is a modern, clean way to reserve space for embeds and responsive images without using the old padding-bottom hack. Browsers with support for aspect-ratio will automatically calculate the height based on the width, preventing layout shifts as the content loads.

Measuring Core Web Vitals

Google provides several tools for measuring Core Web Vitals. The Chrome User Experience Report (CrUX) gives real-user data aggregated by Google. Lighthouse provides a lab-based audit with specific recommendations. PageSpeed Insights combines both real-user and lab data. For field data, use the web-vitals JavaScript library to capture metrics from your actual users and send them to your analytics platform. Aim for the 75th percentile of your users to pass Google’s thresholds — that means 75% of your users should experience LCP under 2.5 seconds, FID under 100 ms, and CLS under 0.1.

// Track real-user Core Web Vitals
import { onLCP, onFID, onCLS } from 'web-vitals';

function sendToAnalytics(metric) {
    navigator.sendBeacon('/analytics', JSON.stringify(metric));
}

onLCP(sendToAnalytics);
onFID(sendToAnalytics);
onCLS(sendToAnalytics);

Core Web Vitals optimization is not a one-time task — monitor your metrics regularly and set up alerts for regressions, especially after deploying new features or third-party scripts. A performance budget in your CI pipeline can prevent regressions before they reach production.

WorldLeish7 Conference: Caratgena Colombia August 2022

WorldLeish7 Conference: Caratgena, Colombia, August 2022

WorldLeish7, the 7th World Congress on Leishmaniasis, was held in Cartagena, Colombia in August 2022. Leishmaniasis is a parasitic disease transmitted by sandflies, affecting 12-15 million people annually across 98 countries. The congress brought together researchers, clinicians, public health officials, and policymakers to share advances in diagnosis, treatment, epidemiology, and control of this neglected tropical disease.

Key Themes and Research Presentations

The conference covered six major tracks: parasite biology and genomics, vector biology and control, immunology and vaccine development, clinical management and drug development, epidemiology and surveillance, and public health policy. Notable presentations included updates on the leishmaniasis vaccine trials (several candidates in Phase II and III trials), new oral treatment regimens (including fexinidazole and miltefosine combinations), and the impact of climate change on sandfly vector distribution—with models predicting expansion into southern Europe and North America as temperatures rise.

# Climate change and vector distribution model (conceptual)
def estimate_risk_shift(temperature_rise: float, current_range: list) -> dict:
    # Simplified model: sandflies expand ~50km per 0.5°C warming
    expansion_km = temperature_rise * 100  # 100 km per °C
    return {
        "temperature_rise": temperature_rise,
        "range_expansion_km": expansion_km,
        "new_regions_at_risk": expansion_km > 200,
        "recommendation": "Enhanced surveillance" if expansion_km > 200
                          else "Current surveillance adequate"
    }

for delta in [0.5, 1.0, 1.5, 2.0]:
    result = estimate_risk_shift(delta, [])
    print(f"+{delta}°C: {result['range_expansion_km']}km expansion → {result['recommendation']}")

Advances in Diagnosis and Treatment

Rapid diagnostic tests (RDTs) based on recombinant antigen rK39 continue to improve, with new multiplex RDTs that distinguish between visceral and cutaneous leishmaniasis in field settings. Loop-mediated isothermal amplification (LAMP) assays for point-of-care molecular diagnosis were demonstrated, achieving 95% sensitivity and 98% specificity in rural health centers without laboratory infrastructure. On the treatment front, thermotherapy (localized heat application) for cutaneous leishmaniasis showed cure rates comparable to pentavalent antimonials with fewer side effects, and liposomal amphotericin B remains the WHO-recommended first-line treatment for visceral leishmaniasis in East Africa, with newer formulations reducing treatment duration from 28 to 10 days.

Surveillance and Elimination Programs

The WHO’s roadmap for neglected tropical diseases (2021-2030) targets leishmaniasis elimination as a public health problem in the Indian subcontinent and East Africa by 2030. Countries like Bangladesh and Nepal have reduced visceral leishmaniasis incidence by over 90% through indoor residual spraying, insecticide-treated nets, and active case finding with rapid diagnostic tests. Challenges remain in conflict-affected regions of East Africa (South Sudan, Somalia, Ethiopia) where health systems are disrupted, and in the Amazon basin where sylvatic transmission cycles make vector control impractical. The conference emphasized the need for integrated control approaches combining vector control, active surveillance, accessible treatment, and community engagement tailored to local epidemiological contexts.

WorldLeish7 Conference Outcomes and Resolutions

The conference concluded with the Cartagena Declaration, committing signatory nations to strengthen leishmaniasis surveillance, improve access to diagnosis and treatment, and support research into new tools. Key targets included: reducing visceral leishmaniasis case fatality rates below 3%, achieving 100% reporting completeness from endemic districts, and ensuring universal access to WHO-recommended diagnostics and treatments by 2025. The declaration also emphasized the need for pediatric formulations of leishmaniasis drugs (current treatments are primarily tested in adults), integration of leishmaniasis surveillance into existing health information systems, and cross-border collaboration in regions where leishmaniasis does not respect national boundaries, particularly in the Horn of Africa and the Amazon basin. The next WorldLeish congress (WorldLeish8) was scheduled to be held in Addis Ababa, Ethiopia, bringing the conference to the continent most affected by visceral leishmaniasis for the first time.

# Modeling elimination targets
def elimination_progress(current_cases, target_cfr, year):
    years_remaining = 2030 - year
    annual_reduction_needed = (current_cases / (1 + years_remaining * 0.1)) / 100
    return {
        "year": year,
        "annual_target": int(annual_reduction_needed),
        "cfr_target": target_cfr,
        "on_track": annual_reduction_needed > 0
    }
for y in range(2022, 2031):
    print(elimination_progress(50000, 0.03, y))
def estimate_treatment_access(current_coverage, target, annual_increase):
    years = 0
    while current_coverage < target:
        current_coverage += annual_increase
        years += 1
    return years
print(f"Years to reach 100% coverage: {estimate_treatment_access(0.65, 1.0, 0.05)}")

Research Priorities Identified at WorldLeish7

The conference identified five priority research areas. First, development of a pan-species vaccine targeting antigens conserved across all Leishmania species—current vaccine candidates target specific species (L. donovani for visceral, L. major for cutaneous). Second, shorter, safer treatment regimens, including combination therapies that reduce treatment duration from 28 days to 10 days and oral alternatives to injectable drugs. Third, point-of-care diagnostics that distinguish between active infection and past exposure (current serological tests cannot differentiate, leading to unnecessary treatment in endemic areas). Fourth, understanding the role of the microbiome in disease progression—emerging evidence suggests gut and skin microbiota influence sandfly attraction and host susceptibility. Fifth, climate change modeling to predict shifting disease burden as sandfly habitats expand into previously unaffected regions at higher altitudes and latitudes.

def predict_burden(temp_rise, current_cases):
    expansion = temp_rise * 0.15
    return int(current_cases * (1 + expansion))
for t in [0.5, 1.0, 1.5, 2.0]:
    print(f"+{t}C: {predict_burden(t, 50000):,} cases")

Introduction to Neural Networks with TensorFlow

Introduction to Neural Networks with TensorFlow

Neural networks are computational models inspired by the structure of biological neurons. They consist of layers of interconnected nodes (neurons) that can learn patterns from data through a process called training. TensorFlow, Google’s machine learning framework, provides a comprehensive ecosystem for building, training, and deploying neural networks. This article walks through building your first neural network with TensorFlow’s Keras API.

The Basic Building Blocks

A neural network consists of an input layer (receiving raw data), hidden layers (where computation happens), and an output layer (producing the prediction). Each connection between neurons has a weight, and each neuron has a bias. During training, the network adjusts these weights and biases to minimize the difference between its predictions and the actual target values. The Keras Sequential API makes this intuitive—you stack layers one after another.

import tensorflow as tf
from tensorflow.keras import layers, models

# Build a simple feedforward network
model = models.Sequential([
    layers.Dense(64, activation='relu', input_shape=(784,)),
    layers.Dropout(0.3),
    layers.Dense(32, activation='relu'),
    layers.Dropout(0.3),
    layers.Dense(10, activation='softmax')  # 10 classes
])

model.compile(
    optimizer='adam',
    loss='sparse_categorical_crossentropy',
    metrics=['accuracy']
)
model.summary()

Activation Functions

Activation functions introduce non-linearity into the network, allowing it to learn complex patterns. Without them, stacking linear layers would be equivalent to a single linear layer. ReLU (Rectified Linear Unit, f(x) = max(0, x)) is the most popular hidden layer activation because it avoids the vanishing gradient problem and is computationally efficient. The sigmoid function (f(x) = 1/(1+e^-x)) squashes values between 0 and 1, making it suitable for binary classification outputs. Softmax generalizes this to multi-class problems by converting raw scores into probabilities that sum to 1.

Training the Network

Training uses backpropagation: the forward pass computes predictions and the loss (error), and the backward pass calculates gradients of the loss with respect to each weight using the chain rule. The optimizer (Adam is the most common) updates weights in the direction that reduces loss. The learning rate controls step size—too large and training diverges; too small and training is impractically slow. Typical learning rates range from 1e-3 to 1e-5 depending on the problem.

# Load and preprocess data
(x_train, y_train), (x_test, y_test) = tf.keras.datasets.mnist.load_data()
x_train = x_train.reshape(-1, 784).astype('float32') / 255.0
x_test = x_test.reshape(-1, 784).astype('float32') / 255.0

# Train the model
history = model.fit(
    x_train, y_train,
    batch_size=32,
    epochs=15,
    validation_split=0.2,
    verbose=1
)

# Evaluate on test data
test_loss, test_acc = model.evaluate(x_test, y_test)
print(f"Test accuracy: {test_acc:.4f}")

Overfitting and Regularization

Overfitting occurs when the model memorizes the training data but fails to generalize to new data. Dropout (randomly disabling neurons during training) and weight decay (L2 regularization) are common techniques to prevent this. Early stopping (monitoring validation loss and stopping when it stops improving) is another practical approach. The goal is a model that performs well on both training and validation data, indicating genuine pattern learning rather than memorization.

Transfer Learning with Pre-Trained Models

Training a neural network from scratch requires substantial data and compute. Transfer learning reuses a pre-trained model (trained on ImageNet’s 1.2 million images) and adapts it to your specific task. You freeze the early layers (which detect universal features like edges and textures), replace the classification head, and train only the new layers on your data. This approach achieves state-of-the-art results with as few as 100 images per class. TensorFlow Hub and PyTorch Hub provide downloadable pre-trained models (ResNet, EfficientNet, MobileNet) that you can integrate in a few lines of code. Fine-tuning (unfreezing later layers with a low learning rate) further improves performance when your dataset differs significantly from ImageNet.

from tensorflow.keras.applications import MobileNetV2

base = MobileNetV2(weights='imagenet', include_top=False, input_shape=(224,224,3))
base.trainable = False

model = tf.keras.Sequential([
    base,
    tf.keras.layers.GlobalAveragePooling2D(),
    tf.keras.layers.Dropout(0.3),
    tf.keras.layers.Dense(10, activation='softmax')
])
model.compile(optimizer='adam', loss='categorical_crossentropy', metrics=['accuracy'])

Convolutional Neural Networks for Images

While dense networks work for simple datasets, real-world image classification requires convolutional layers. CNNs use filters that slide over the input image, detecting local patterns like edges, textures, and shapes. Each convolutional layer learns increasingly complex features—early layers detect edges and color blobs, middle layers detect shapes and patterns, and final layers detect complete objects. Pooling layers reduce spatial dimensions, providing translation invariance. TensorFlow’s Keras API provides Conv2D, MaxPooling2D, and Flatten layers that stack to form a CNN. Pre-trained models like ResNet50 and MobileNetV2 provide state-of-the-art accuracy through transfer learning on the ImageNet dataset.

Training Tips and Common Issues

When training neural networks, watch for: loss not decreasing (learning rate too high or too low, data not normalized), loss plateauing (model capacity insufficient, try more neurons or layers), loss diverging (learning rate too high, gradient clipping needed), and overfitting (training loss much lower than validation loss, add dropout or reduce model size). Use learning rate schedulers (ReduceLROnPlateau reduces LR when validation loss plateaus) and early stopping to prevent overfitting automatically. TensorBoard provides real-time visualization of training curves, weight distributions, and gradient histograms. Start with a simple model that overfits a small sample of data, then add regularization and increase data to achieve generalization. This iterative approach is faster than building a complex model from the start.

REST API Design Best Practices

REST API Design Best Practices

A well-designed REST API is intuitive to use, consistent across endpoints, and resilient to change. Good API design reduces integration time for clients, minimizes breaking changes, and makes your service easier to maintain. This article covers the core principles — resource naming, HTTP methods, status codes, pagination, and error handling — that every API designer should follow.

Resource Naming Conventions

Use nouns (not verbs) to represent resources, and use plural forms for collections. The URL should describe the resource, not the action. Actions on resources are expressed through HTTP methods, not URL paths. For example, POST /api/users creates a user, DELETE /api/users/42 deletes user 42 — the verb is in the HTTP method, not the URL. Nest resources hierarchically when there is a clear ownership relationship: /api/users/42/orders lists orders belonging to user 42. Avoid nesting deeper than three levels because deeply nested URLs are hard to navigate and maintain. Use query parameters for filtering, sorting, and searching rather than encoding these in the path.

# Good resource naming
GET    /api/v2/users              # list users
POST   /api/v2/users              # create user
GET    /api/v2/users/42           # get user 42
PATCH  /api/v2/users/42           # partially update user 42
DELETE /api/v2/users/42           # delete user 42
GET    /api/v2/users/42/orders    # list orders for user 42

# Filtering and sorting via query parameters
GET /api/users?role=admin&status=active
GET /api/users?sort=created_at&order=desc
GET /api/users?search=alice

# Bad naming — verbs in URLs
GET  /api/getUser                # should be GET /api/users/42
POST /api/createUser             # should be POST /api/users
POST /api/deleteUser             # should be DELETE /api/users/42

HTTP Methods and Status Codes

Use HTTP methods according to their defined semantics — GET for reading, POST for creating, PUT for full replacement, PATCH for partial updates, DELETE for removal. Each method should return the appropriate status code: 200 for successful GET and PATCH responses (with the resource in the body), 201 for successful creation (with the new resource and a Location header), 204 for successful deletion (no body), and 422 for validation errors. Use 400 for malformed requests, 401 for missing or invalid authentication, 403 for authenticated but unauthorized access, 404 for resources that do not exist, and 409 for conflicts (e.g., duplicate resource creation).

# Response status codes
POST /api/users  ->  201 Created
  Location: /api/users/42
  Body: { "id": 42, "name": "Alice", ... }

GET /api/users/42  ->  200 OK
  Body: { "id": 42, "name": "Alice", ... }

DELETE /api/users/42  ->  204 No Content
  (no body)

POST /api/users  ->  422 Unprocessable Entity
  Body: { "error": "validation_failed", "fields": { "email": "must be a valid email" } }

GET /api/users/999  ->  404 Not Found
  Body: { "error": "not_found", "message": "User 999 does not exist" }

Pagination

Any endpoint that returns a list of resources MUST support pagination. Without it, a single request could return millions of records, overwhelming both the server and the client. The two most common pagination strategies are offset-based (page and per_page) and cursor-based (using a cursor or token from the last item). Offset-based pagination is simpler but becomes inefficient on large datasets because the database must scan and skip rows. Cursor-based pagination is more performant but requires clients to handle opaque tokens. Whichever strategy you choose, always include metadata in the response so clients know the total count and how to paginate further.

# Offset-based pagination request
GET /api/users?page=2&per_page=25

# Response with pagination metadata
{
  "data": [
    { "id": 26, "name": "Alice" },
    { "id": 27, "name": "Bob" }
  ],
  "meta": {
    "page": 2,
    "per_page": 25,
    "total": 142,
    "total_pages": 6
  },
  "links": {
    "first": "/api/users?page=1",
    "prev": "/api/users?page=1",
    "next": "/api/users?page=3",
    "last": "/api/users?page=6"
  }
}

# Cursor-based pagination
GET /api/users?cursor=eyJpZCI6IDI1fQ==&limit=25
{
  "data": [ ... ],
  "meta": {
    "next_cursor": "eyJpZCI6IDUwfQ==",
    "has_more": true
  }
}

Consistent Error Responses

All errors should return a consistent JSON structure that includes an error code (machine-readable), a message (human-readable), and optionally a list of field-level errors for validation failures. Never return raw HTML, stack traces, or server error pages from your API — these expose implementation details and make client-side error handling impossible. Use standard error codes that map to HTTP status codes but provide more granularity: validation_error, not_found, authentication_required, insufficient_permissions, rate_limit_exceeded, and internal_error.

# Standard error response format
{
  "error": {
    "code": "validation_error",
    "message": "The request body contains invalid fields",
    "details": [
      {
        "field": "email",
        "code": "invalid_format",
        "message": "Must be a valid email address"
      },
      {
        "field": "age",
        "code": "out_of_range",
        "message": "Must be between 0 and 150"
      }
    ],
    "request_id": "req_abc123"
  }
}

REST API design is primarily about consistency. Once you establish conventions for naming, pagination, error formats, and status codes, apply them uniformly across every endpoint. Developers who consume your API should be able to predict how a new endpoint works based on how the existing ones work — that is the hallmark of a well-designed API.

Empowering Developers for Seamless Collaboration with GitHub Tools

Empowering Developers for Seamless Collaboration with GitHub Tools

GitHub has evolved from a Git hosting service into a comprehensive developer platform offering issue tracking, CI/CD (GitHub Actions), package registry, code scanning, project management, and wiki documentation. These integrated tools streamline the entire software development lifecycle within a single interface, reducing context switching and enabling seamless collaboration for distributed teams.

GitHub Issues and Project Management

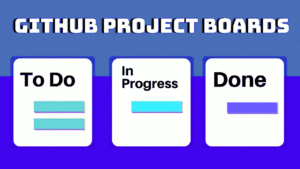
GitHub Issues track bugs, feature requests, and tasks with labels, assignees, milestones, and linked pull requests. The modern issue experience includes issue templates (standardized formats for bug reports and feature requests), issue forms (structured YAML-defined forms with validation), and task lists within issues for tracking sub-tasks. GitHub Projects provides a Kanban-style board that automatically syncs with issues and PRs, supporting custom workflows with status fields, iterations, and insights dashboards. Automations can move cards between columns based on label changes, PR merges, or scheduled dates, reducing manual board management.

# Using GitHub CLI to manage issues
gh issue create --title "Add dark mode" --body "Users have requested a dark theme..."   --label enhancement --assignee @me --project "Q3 Sprint"

gh issue list --label bug --assignee @me
gh issue view 42  # View issue details in terminal

# Link PR to issue automatically (mention in PR description)
# Closes #42 — PR will auto-close the issue when merged

GitHub Actions for CI/CD

GitHub Actions provides workflow automation triggered by GitHub events (push, PR, schedule, issue creation). Workflows are YAML files in .github/workflows/ that define jobs running on GitHub-hosted or self-hosted runners. Each job consists of steps that can run commands or use pre-built actions from the Marketplace. Common workflows include running tests on every push, deploying to cloud platforms on merge to main, publishing packages to npm or Docker Hub on version tags, and scheduled tasks like dependency updates or database backups.

# .github/workflows/ci.yml
name: CI
on: [push, pull_request]
jobs:
  test:
    runs-on: ubuntu-latest
    steps:
      - uses: actions/checkout@v4
      - uses: actions/setup-python@v5
        with: { python-version: "3.12" }
      - run: pip install -r requirements.txt
      - run: pytest --cov=src --cov-report=xml
      - uses: codecov/codecov-action@v4
  deploy:
    needs: test
    if: github.ref == 'refs/heads/main'
    runs-on: ubuntu-latest
    steps:
      - uses: actions/checkout@v4
      - uses: superfly/flyctl-actions@1.5
        with: { args: "deploy" }
        env: { FLY_API_TOKEN: ${{ secrets.FLY_API_TOKEN }} }

Code Review with Pull Requests

GitHub’s pull request interface supports inline code comments, suggested changes (one-click accept), draft PRs (mark work-in-progress without triggering CI), and required reviewers with branch protection rules. Review assignment can be automatic (code owners file, load balancing round-robin). Conversation resolution tracks when comments are addressed. The Checks tab shows CI status directly in the PR. Merge queues (GitHub Merge Queue) automatically test PRs in batches before merging, ensuring main is always green even with concurrent merges. For security-sensitive projects, CODEOWNERS can enforce that specific files require review from designated teams.

Security Features

Dependabot automatically scans dependencies for known vulnerabilities (from GitHub Advisory Database) and creates PRs to update them. Secret scanning detects exposed credentials (API keys, tokens, passwords) in repositories and alerts the security team. CodeQL analysis runs static analysis on every push, finding security vulnerabilities (SQL injection, XSS, path traversal) and code quality issues. SBOM (Software Bill of Materials) generation outputs a machine-readable inventory of all dependencies, helping with supply chain security compliance. These security features, combined with mandatory 2FA enforcement and SAML/SSO for organizations, make GitHub a secure platform for enterprise development teams.

GitHub Actions Advanced Patterns

GitHub Actions supports matrices (running the same job with different OS or language versions), reusable workflows (calling a workflow from another workflow, avoiding duplication), environments (with approval gates and secrets scoped to deployment targets), and composite actions (bundling multiple steps into a reusable action). For monorepos, paths filtering triggers workflows only when specific directories change. The concurrency group prevents duplicate workflow runs on the same branch. Workflow commands allow creating annotations, setting outputs, and updating the job summary from within script steps. Artifact and cache actions speed up builds by persisting dependencies between runs. For self-hosted runners, autoscaling with actions-runner-controller on Kubernetes provides enterprise-level capacity management.

# Matrix testing across Python versions and OS
jobs:
  test:
    strategy:
      matrix:
        os: [ubuntu-latest, macos-latest, windows-latest]
        python: ["3.9", "3.10", "3.11", "3.12"]
    runs-on: ${{ matrix.os }}
    steps:
      - uses: actions/setup-python@v5
        with: { python-version: ${{ matrix.python }} }
      - run: pip install . && pytest

GitHub Pages and Documentation

GitHub Pages hosts static websites directly from repositories, supporting Jekyll, Hugo, and plain HTML. Project pages (served from a gh-pages branch or /docs folder) provide free documentation hosting with custom domain support and automatic HTTPS. Pages integrates with Actions: build your static site generator, deploy the output to Pages, and invalidate the CDN cache automatically. GitHub Wikis provide collaborative documentation that anyone with repository access can edit, with version history and search. For API documentation, GitHub’s support for OpenAPI/Swagger renders specification files directly in the repository view. Combined with the GitHub REST API and GraphQL API, you can automate documentation generation and maintain a project website without leaving the GitHub ecosystem.

Using Slack APIs for Workflow Automation

Using Slack APIs for Workflow Automation

Slack is the central communication hub for many teams, and its APIs turn chat messages into programmable events. You can build bots that respond to commands, send alerts from monitoring systems, automate approval workflows, and integrate with virtually any external service. This article covers the three main Slack API patterns: slash commands, incoming webhooks, and the Events API, with Python examples using the Bolt framework.

Slash Commands with Bolt

Slash commands let users trigger actions by typing a command in any Slack channel, like /deploy or /ticket. When a user types a slash command, Slack sends an HTTP POST request to your server with the command text, user info, and channel details. Your server processes the request and responds (within 3 seconds for synchronous responses, or use response_url for deferred responses). The Bolt framework for Python handles request verification, parsing, and response formatting.

# Install: pip install slack-bolt
from slack_bolt import App
from slack_bolt.adapter.socket_mode import SocketModeHandler
import os

app = App(token=os.environ["SLACK_BOT_TOKEN"])

@app.command("/deploy")
def handle_deploy(ack, command, client):
    ack()  # acknowledge command within 3 seconds
    env = command["text"].strip() or "staging"

    # Post a message to the channel
    client.chat_postMessage(
        channel=command["channel_id"],
        text=f"Deploying to {env}... :rocket:"
    )

    # In a real application, trigger a CI/CD pipeline here
    # and use response_url for the result

# Start the app
if __name__ == "__main__":
    handler = SocketModeHandler(app, os.environ["SLACK_APP_TOKEN"])
    handler.start()

Incoming Webhooks

Incoming webhooks are the simplest way to send messages to Slack from any system. You get a unique webhook URL that accepts a JSON payload describing the message. No authentication headers are needed — the URL itself is the secret. Webhooks are ideal for sending alerts from monitoring systems (Prometheus, Datadog, PagerDuty), CI/CD pipeline notifications (GitHub Actions, Jenkins), and any script that needs to notify a Slack channel.

# Send an alert from a shell script
curl -X POST -H 'Content-type: application/json'     --data '{
        "text": "*Build #42 passed!* :white_check_mark:",
        "attachments": [
            {
                "color": "#36a64f",
                "fields": [
                    {"title": "Branch", "value": "main", "short": true},
                    {"title": "Duration", "value": "3m 12s", "short": true}
                ],
                "footer": "CI Pipeline",
                "ts": 1712345678
            }
        ]
    }'     https://hooks.slack.com/services/T00/B00/xxxxx

# Python example
import requests
import json

webhook_url = "https://hooks.slack.com/services/T00/B00/xxxxx"
slack_data = {
    "text": "Deployment complete :tada:",
    "attachments": [{
        "color": "#FFA500",
        "title": "Deployment Summary",
        "fields": [
            {"title": "Version", "value": "v2.1.0", "short": True},
            {"title": "Environment", "value": "production", "short": True},
        ],
    }]
}
requests.post(webhook_url, json=slack_data)

Events API — Responding to Messages in Real Time

The Events API lets your app subscribe to events happening in Slack — messages posted, reactions added, files shared, users joining channels. When an event occurs, Slack sends your server a JSON payload. The Events API requires a publicly accessible HTTPS endpoint (use ngrok for development) and URL verification (Slack sends a challenge token that your server must echo back). The Bolt framework handles all of this automatically.

from slack_bolt import App

app = App(token=os.environ["SLACK_BOT_TOKEN"])

# React when someone says "help" in a channel
@app.message("help")
def say_help(message, say):
    say(
        blocks=[
            {
                "type": "section",
                "text": {"type": "mrkdwn", "text": "How can I help you?"}
            },
            {
                "type": "actions",
                "elements": [
                    {"type": "button", "text": {"type": "plain_text", "text": "Docs"}, "url": "https://docs.example.com"},
                    {"type": "button", "text": {"type": "plain_text", "text": "Support"}, "url": "https://support.example.com"},
                ]
            }
        ],
        thread_ts=message["ts"]  # reply in thread
    )

# Watch for emoji reactions
@app.event("reaction_added")
def handle_reaction(event, client):
    if event["reaction"] == "white_check_mark":
        # Auto-approve when someone adds a checkmark
        client.chat_postMessage(
            channel=event["item"]["channel"],
            text="Approved! :white_check_mark:",
            thread_ts=event["item"]["ts"]
        )

Interactive Components and Modals

Beyond simple messages, Slack supports interactive components: buttons, select menus, date pickers, and modals. When a user clicks a button in a message, Slack sends an interaction payload to your server. This enables rich workflows like approval requests (approve/reject buttons on a deployment notification), form submissions (a /vacation command opens a modal with date fields), and dynamic updates (a /poll command creates a message with vote buttons that update in real time). Interactive components use the same Bolt framework with @app.action() and @app.view() handlers for modals.

# Interactive approval workflow
@app.action("approve_deploy")
def handle_approval(ack, say, body):
    ack()
    user = body["user"]["name"]
    say(f":white_check_mark: Deployment approved by {user}")
    # Trigger actual deployment here

@app.action("reject_deploy")
def handle_rejection(ack, say, body):
    ack()
    user = body["user"]["name"]
    say(f":x: Deployment rejected by {user} — notify team")

Slack's APIs are well-documented and provide everything needed to build production-grade integrations. Start with incoming webhooks for simple notifications, add slash commands for user-triggered actions, and use the Events API for real-time bots that respond to activity in your workspace. The Bolt framework handles the HTTP plumbing so you can focus on your business logic.

Slack Bolt Framework for Python

The Slack Bolt Python framework simplifies building Slack apps with its familiar decorator pattern. The @app.command(), @app.message(), and @app.action() decorators register handlers for slash commands, message patterns, and interactive components. Bolt handles OAuth flow, request verification, and payload parsing automatically. The framework supports both socket mode (for development without public endpoints) and HTTP mode (for production behind a reverse proxy). Bolt's middleware system allows adding logging, rate limiting, and authentication checks to all handlers. Async support (Bolt with asyncio) handles high-volume Slack apps where multiple events arrive concurrently. The framework also supports workflow steps (custom functions for Slack Workflow Builder) and granular bot tokens for fine-grained permission scoping.

Unity vs Unreal: Choosing the Right Game Engine

Unity vs Unreal: Choosing the Right Game Engine

Unity and Unreal Engine are the two dominant game engines, each with distinct strengths, ecosystems, and learning curves. Choosing between them depends on your project type, team size, target platforms, visual fidelity requirements, and team expertise. This article provides a detailed comparison across key dimensions to help you make an informed decision.

Programming Languages and Learning Curve

Unity uses C# for scripting. C# is a high-level, garbage-collected language with a gentle learning curve—new developers can be productive within weeks. Unity’s API is well-documented with extensive tutorials and a massive Asset Store. Unreal Engine uses C++ (with Blueprints visual scripting for non-programmers). C++ offers maximum performance but requires manual memory management and a deeper understanding of pointers, templates, and the build system. Blueprints allow designers to prototype gameplay without code but can become unwieldy for complex logic. Unity’s Scriptable Objects provide a data-driven architecture that is simpler than Unreal’s Gameplay Ability System.

// Unity C# — simple, readable
public class PlayerMovement : MonoBehaviour {
    public float speed = 5f;
    void Update() {
        float h = Input.GetAxis("Horizontal");
        float v = Input.GetAxis("Vertical");
        transform.Translate(new Vector3(h, 0, v) * speed * Time.deltaTime);
    }
}

// Unreal C++ — more verbose, more control
void APlayerCharacter::SetupPlayerInputComponent(UInputComponent* Input) {
    Input->BindAxis("MoveForward", this, &APlayerCharacter::MoveForward);
    Input->BindAxis("MoveRight", this, &APlayerCharacter::MoveRight);
}
void APlayerCharacter::MoveForward(float Value) {
    if (Controller && Value != 0.0f) {
        AddMovementInput(GetActorForwardVector(), Value);
    }
}

Rendering and Visual Quality

Unreal Engine 5 sets the benchmark for visual quality. Nanite (virtualized micropolygon geometry) renders film-quality assets with billions of polygons in real-time. Lumen (dynamic global illumination) provides realistic indirect lighting without baked lightmaps. These features make Unreal the default choice for AAA games, architectural visualization, and cinematics. Unity’s High-Definition Render Pipeline (HDRP) produces near-AAA quality but requires more manual optimization to match Unreal’s out-of-the-box fidelity. Unity’s Universal Render Pipeline (URP) trades some visual quality for broad platform support—it runs on mobile, VR, and low-end hardware. For mobile and 2D games, Unity has a clear advantage; for photorealistic 3D, Unreal leads.

Platform Support and Ecosystem

Unity supports over 25 platforms including iOS, Android, Windows, Mac, Linux, WebGL, PlayStation, Xbox, Nintendo Switch, and VR/AR headsets. This broad platform support makes Unity the choice for cross-platform mobile and indie games. Unreal supports the major platforms but has less mature mobile support—its mobile renderer lags behind Unity’s URP. Unity’s Asset Store has over 100,000 assets including models, animations, tools, and editor extensions. Unreal’s Marketplace has fewer but higher-quality assets. Both engines have active communities, but Unity’s community is larger and produces more tutorials due to its wider adoption in education and indie development.

Pricing and Licensing

Unity Personal is free for individuals and small studios with less than $200K in annual revenue. Unity Pro costs $2,040/year per seat. Unity’s “runtime fee” (per-install charge) was announced and partially walked back, creating uncertainty—currently the fee applies only to Unity Enterprise subscribers with over $1M revenue. Unreal Engine is royalty-free with a 5% gross revenue royalty after the first $1M per title. Epic waives the royalty for games published on the Epic Games Store. For most indie developers, both engines are effectively free until significant commercial success. The long-term cost difference is usually negligible compared to development salaries.

Asset Store and Community Content

The Unity Asset Store offers over 100,000 assets including 3D models, animations, textures, audio, editor extensions, and complete project templates. Popular categories include environment packs, character controllers, UI frameworks, shader packs, and post-processing effects. Some high-quality assets (like Amplify Shader Editor, Final IK, and A* Pathfinding Project) have become industry standards used by AAA studios. The Unreal Marketplace has fewer assets but maintains higher quality standards through a curated review process—Epic’s Quixel Megascans library (8K photogrammetry assets) is available free to Unreal Engine users. Both ecosystems have seasonal sales (Unreal’s Mega Sale, Unity’s Publisher Sales) where assets are heavily discounted. For asset-heavy projects, Unreal’s free monthly content (from the Marketplace) and the Megascans library can significantly reduce 3D modeling costs, while Unity’s broader asset selection supports more niche genres and non-gaming applications.

2D vs 3D Specialization

For 2D games, Unity has a mature 2D toolset: dedicated 2D renderer, Tilemap system with rule tiles, 2D physics, and sprite rigging. Godot’s 2D engine is also excellent. For 3D games, Unreal’s visual quality is unmatched for photorealistic rendering. The decision matrix: 2D mobile/indie game? Unity or Godot. Photorealistic 3D AAA? Unreal. Cross-platform 2D+3D with a small team? Unity (largest asset store, most tutorials). Open-source project? Godot (free, no royalties). VR/AR? Unity has the most mature XR toolkit.

Containerization with Docker on Linux

Containerization with Docker on Linux

Docker revolutionized software deployment by packaging applications and their dependencies into lightweight, portable containers. Unlike virtual machines, containers share the host operating system kernel, making them faster to start and far more memory-efficient. This article walks through building a containerized Java application with Docker and orchestrating multi-service setups with Docker Compose.

What Is a Docker Container?

A container is a runtime instance of a Docker image. The image is a read-only template containing the application code, runtime, libraries, and configuration. Docker images are built in layers, where each instruction in the Dockerfile adds a new layer. Layers are cached, so rebuilding after a source change only re-adds the layers that changed. This makes Docker builds both fast and reproducible.

Writing a Dockerfile

The Dockerfile is a recipe that tells Docker how to build your image. Every Dockerfile starts with a FROM instruction that specifies a base image. Choosing a minimal base like Alpine Linux keeps images small — the Eclipse Temurin JDK 21 Alpine image is under 200 MB compared to over 400 MB for the full Ubuntu-based one.

FROM eclipse-temurin:21-jdk-alpine
WORKDIR /app
COPY target/app.jar .
EXPOSE 8080
ENTRYPOINT ["java", "-jar", "app.jar"]

Each line in this Dockerfile has a specific purpose. WORKDIR /app sets the working directory inside the container to /app. COPY target/app.jar . copies the compiled JAR file from the host’s target/ directory into the container’s working directory. EXPOSE 8080 is documentation — it tells anyone running the container that the application listens on port 8080 but does not actually publish the port. ENTRYPOINT defines the command that runs when the container starts. Build the image with docker build -t myapp . and run it with docker run -p 8080:8080 myapp, which maps the host’s port 8080 to the container’s port 8080.

Multi-Stage Builds

For compiled languages like Java or Go, you can use multi-stage builds to keep the final image small. One stage compiles the code using a full SDK image, and a second stage copies only the compiled artifact into a minimal runtime image. This way, build tools like Maven or Gradle are not part of the final image.

# Stage 1: Build
FROM maven:3.9-eclipse-temurin-21 AS build
WORKDIR /app
COPY pom.xml .
RUN mvn dependency:go-offline
COPY src ./src
RUN mvn package -DskipTests

# Stage 2: Runtime
FROM eclipse-temurin:21-jdk-alpine
WORKDIR /app
COPY --from=build /app/target/app.jar .
EXPOSE 8080
ENTRYPOINT ["java", "-jar", "app.jar"]

The final image contains only the JRE (or JDK) and the JAR — not Maven, not the source code, and not the Maven cache. This reduces the image from over 1 GB to around 180 MB.

Docker Compose for Multi-Service Applications

Most real-world applications involve multiple services: a web server, a database, a cache, and perhaps a message queue. Docker Compose lets you define all services in a single compose.yaml file and start them with one command: docker compose up.

services:
  web:
    build: .
    ports:
      - "8080:8080"
    depends_on:
      - db
    environment:
      - DATABASE_URL=jdbc:postgresql://db:5432/mydb

  db:
    image: postgres:16
    volumes:
      - pgdata:/var/lib/postgresql/data
    environment:
      POSTGRES_DB: mydb
      POSTGRES_USER: app
      POSTGRES_PASSWORD: secret

volumes:
  pgdata:

The depends_on field ensures the database service starts before the web service. Services communicate over an internal Docker network using their service names as hostnames — so the web app connects to db:5432 instead of localhost:5432. The volumes section creates a named volume pgdata that persists the database data across container restarts, preventing data loss when the container is recreated.

Useful Docker Commands

# List running containers
docker ps

# View logs from a container
docker logs -f myapp

# Execute a command inside a running container
docker exec -it myapp sh

# Clean up unused resources
docker system prune -af

# Inspect image layers
docker history myapp:latest

Docker containers are ephemeral by design — treat them as disposable. Store state in volumes or external services. With this approach, you can deploy, scale, and update applications reliably across any Linux server, from your laptop to a production Kubernetes cluster.

Docker Networking and Security

Docker networking has three built-in drivers: bridge (default, isolated network per container group), host (container uses host network stack), and overlay (multi-host networking for Docker Swarm). For security, run containers as non-root users, drop Linux capabilities, use read-only root filesystems, and enable Content Trust to verify image signatures. Use Docker Bench Security to audit container configurations. Multi-stage builds separate build dependencies from runtime dependencies—the final image only contains the compiled binary and minimal runtime libraries, reducing both attack surface and deployment time.

Docker Compose and Development Workflows

Docker Compose defines multi-container applications in a docker-compose.yml file, enabling one-command startup of the entire development environment (web server, database, cache, message queue). Compose features include: dependency-based startup order (depends_on with health checks), environment variable files (.env), named volumes for persistent data, network configuration for service discovery, and health checks for container readiness. The compose watch feature (Docker Compose 2.23+) automatically syncs file changes and rebuilds containers, enabling hot-reloading development workflows. For testing, Compose can spin up test infrastructure (test databases, mock services) alongside test suites, then tear everything down with docker compose down. Profiles in Compose allow starting different service subsets for development vs. production-like testing.