Using Folium for Map Creation in Python

Using Folium for Map Creation in Python

Folium is a Python library that creates interactive Leaflet maps directly from Python data structures. It bridges the gap between data analysis in Pandas and geographic visualization, allowing you to create professional-quality maps with minimal code. Folium supports tile layers from OpenStreetMap, Mapbox, CartoDB, and other providers, along with markers, choropleths, heatmaps, and popups for data exploration.

Basic Map Creation

Creating a map with Folium starts with the folium.Map constructor, which takes a location (latitude, longitude), zoom level, and tile style as parameters. The default tile set is OpenStreetMap, but you can switch to Stamen Terrain, CartoDB Positron, or other styles to match your aesthetic needs. Maps are HTML widgets that can be displayed in Jupyter notebooks, saved as standalone HTML files, or embedded in web pages.

import folium

# Create a base map centered on New York City
m = folium.Map(location=[40.7128, -74.0060], zoom_start=12,
               tiles="CartoDB positron")
m.save("nyc_map.html")

# Create a map with different tile styles
m_terrain = folium.Map(location=[40.7128, -74.0060],
                       tiles="Stamen Terrain", zoom_start=11)
m_terrain.save("nyc_terrain.html")

Markers and Popups

Markers pinpoint locations on the map. Folium’s Marker class takes a location (lat, lng) and optional popup text or tooltip. For large datasets, using CircleMarker instead of the default icon marker improves performance—they render as SVG circles that scale well with hundreds of points. You can customize marker colors, icons (using Font Awesome or Bootstrap icons), and popup content to include formatted text, images, or even charts rendered as HTML.

import folium, pandas as pd

m = folium.Map(location=[40.7128, -74.0060], zoom_start=11)

# Sample data: coffee shops
shops = [
    {"name": "Blue Bottle", "lat": 40.7266, "lng": -73.9968, "rating": 4.5},
    {"name": "Stumptown", "lat": 40.7295, "lng": -73.9965, "rating": 4.3},
    {"name": "Intelligentsia", "lat": 40.7282, "lng": -73.9943, "rating": 4.4},
]
for shop in shops:
    color = "green" if shop["rating"] >= 4.4 else "orange"
    folium.CircleMarker(
        location=[shop["lat"], shop["lng"]],
        radius=12, color=color, fill=True, fill_opacity=0.7,
        popup=f"{shop['name']}
Rating: {shop['rating']}/5", tooltip=shop["name"] ).add_to(m) m.save("coffee_shops.html")

Choropleth Maps for Geographic Data

Choropleth maps color geographic regions (countries, states, districts) based on a data value. Folium’s choropleth layer requires two inputs: a GeoJSON file defining region boundaries, and a data column mapping each region ID to a value. This is powerful for visualizing election results, population density, infection rates, or economic indicators by region. The key is matching the GeoJSON feature IDs to your data keys—usually ISO country codes or FIPS state codes.

import folium, json, pandas as pd

m = folium.Map(location=[39.8, -98.5], zoom_start=4)

# Unemployment data by state (simulated)
data = pd.DataFrame({
    "state": ["AL", "AK", "AZ", ...],  # state FIPS or abbreviation
    "unemployment": [4.2, 5.1, 3.8, ...]
})

folium.Choropleth(
    geo_data="us-states.json",  # GeoJSON file
    name="choropleth",
    data=data,
    columns=["state", "unemployment"],
    key_on="feature.id",
    fill_color="YlOrRd",
    fill_opacity=0.7,
    line_opacity=0.2,
    legend_name="Unemployment Rate (%)"
).add_to(m)
m.save("unemployment.html")

Heatmaps and Clustering

For visualizing point density (e.g., crime locations, taxi pickups, earthquake epicenters), Folium offers HeatMap (from folium.plugins) which renders a smooth density surface where color intensity represents point concentration. The MarkerCluster plugin groups nearby markers into clusters that expand as you zoom in, making it practical to display thousands of points without overwhelming the browser. Both plugins integrate seamlessly with Folium’s API and work well in Jupyter notebooks and web dashboards. Folium maps can also be combined with other visualization libraries—for example, using Altair to generate a chart and embedding it in a map popup, giving you the full power of the Python data visualization ecosystem on an interactive geographic canvas.

GeoPandas Integration

GeoPandas extends Pandas with geospatial data types (GeoSeries, GeoDataFrame) and operations (buffer, intersection, distance, convex hull). Folium maps can directly visualize GeoDataFrames using the explore() method, which accepts a GeoDataFrame and automatically creates a choropleth or point map. This integration enables complex spatial analysis pipelines: load shapefiles or GeoJSON with GeoPandas, perform spatial operations (filter points within a polygon, compute nearest neighbors), and visualize results with Folium in a few lines of code. The combination of GeoPandas for analysis and Folium for visualization covers 90% of geospatial data science workflows without requiring GIS desktop software.

import geopandas as gpd

# Load world countries shapefile
world = gpd.read_file(gpd.datasets.get_path("naturalearth_lowres"))
# Filter to a continent
asia = world[world["continent"] == "Asia"]
# Create Folium map
m = asia.explore(column="pop_est", cmap="YlOrRd", legend=True)
m.save("asia_population.html")

Real-Time Data with Folium

Folium maps can display real-time data by updating markers dynamically. While Folium itself generates static HTML, combining it with JavaScript setInterval() calls to refresh GeoJSON data sources creates live-updating maps. For production dashboards, consider using Streamlit with st_folium which supports bidirectional communication between Python and the map. The folium.plugins package adds TimestampedGeoJson for animating data over time, Draw for user input, and Fullscreen for presentation mode. Folium’s FeatureGroup organizes related markers into toggleable layers. The integration with ipyleaflet provides higher performance for interactive exploration with WebGL support for millions of points.
Creating a CLI Utility for Bulk File Rename Operations Using Python

Creating a CLI Utility for Bulk File Rename Operations Using Python

Renaming hundreds of files manually is tedious and error-prone. A Python command-line utility can automate bulk renaming with patterns, regex substitution, numbering sequences, and dry-run previews. This article walks through building a practical CLI tool using argparse and pathlib, covering common renaming scenarios like normalizing filenames, adding prefixes/suffixes, replacing text, and numbering files sequentially.

Core Design with argparse and pathlib

Python’s argparse module handles command-line argument parsing, and pathlib provides an object-oriented interface to filesystem paths. The tool should support several rename modes: replace (find and replace text in filenames), prefix/suffix (add leading or trailing text), number (add sequential numbering), and regex (pattern-based replacement using regular expressions). A dry-run flag (-n or –dry-run) is essential—it shows what would happen without actually renaming anything, letting users verify the operation before executing.

import argparse, re
from pathlib import Path

def bulk_rename(directory, find=None, replace=None,
                prefix="", suffix="", dry_run=False):
    path = Path(directory)
    for file in path.iterdir():
        if not file.is_file():
            continue
        old_name = file.name
        new_name = old_name
        if find and replace is not None:
            new_name = new_name.replace(find, replace)
        if prefix:
            new_name = prefix + new_name
        if suffix:
            stem = Path(new_name).stem
            ext = Path(new_name).suffix
            new_name = f"{stem}{suffix}{ext}"
        if new_name != old_name:
            print(f"  {old_name} → {new_name}")
            if not dry_run:
                file.rename(file.with_name(new_name))

if __name__ == "__main__":
    parser = argparse.ArgumentParser(description="Bulk rename files")
    parser.add_argument("directory", help="Target directory")
    parser.add_argument("--find", help="Text to find")
    parser.add_argument("--replace", help="Replacement text")
    parser.add_argument("--prefix", default="", help="Add prefix")
    parser.add_argument("--suffix", default="", help="Add suffix")
    parser.add_argument("-n", "--dry-run", action="store_true", help="Preview only")
    args = parser.parse_args()
    bulk_rename(args.directory, args.find, args.replace,
                args.prefix, args.suffix, args.dry_run)

Sequential Numbering

Adding sequential numbers to files is useful for photo collections, document scanning, or creating ordered playlists. The –number flag adds a zero-padded sequence number (e.g., 001, 002) to each file. You can specify the starting number, padding width, and position (prefix vs suffix). Sorting can be by name, modification date, or creation date to control the numbering order. The script detects and prevents collisions by checking whether the target filename already exists before renaming.

def add_numbering(files, start=1, padding=3, as_prefix=True, by="name"):
    if by == "date":
        files.sort(key=lambda f: f.stat().st_mtime)
    else:
        files.sort()
    for i, file in enumerate(files, start=start):
        num = str(i).zfill(padding)
        old = file.name
        stem = file.stem
        ext = file.suffix
        new_name = f"{num}_{stem}{ext}" if as_prefix else f"{stem}_{num}{ext}"
        yield old, new_name

# Usage: python rename.py ./photos --number --start 1 --padding 4 --by date

Regex-Based Renaming

For complex transformations, regex is indispensable. The –regex flag enables pattern-based matching with capture groups that can be referenced in the replacement string (e.g., , ). This is useful for extracting and reformatting date patterns, normalizing spacing, or restructuring naming conventions. For example, renaming “IMG_20260709_123456.jpg” to “2026-07-09_12-34-56.jpg” uses a single regex substitution with capture groups for year, month, day, hour, minute, and second.

def regex_rename(directory, pattern, replacement, dry_run=False):
    path = Path(directory)
    for file in path.iterdir():
        if not file.is_file():
            continue
        new_name = re.sub(pattern, replacement, file.name)
        if new_name != file.name:
            print(f"  {file.name} → {new_name}")
            if not dry_run:
                file.rename(file.with_name(new_name))

# Example: python rename.py ./photos --regex "(IMG_)(\d{4})(\d{2})(\d{2})" --replace "--_"

Safety Features

Beyond dry-run mode, the utility should include collision detection (preventing overwrites), undo functionality (saving rename operations to a log file that can reverse them), and confirmation prompts before executing on more than a threshold number of files. Using pathlib’s rename() method is atomic on most filesystems, meaning a partially completed batch leaves some files renamed and others not—logging each operation to a JSON file allows reversing with a simple –undo flag that reads the log and reverses the mapping.

Cross-Platform Considerations

Python’s pathlib.Path handles path separators correctly on Windows (backslash), macOS, and Linux. However, renaming files across filesystems (e.g., renaming on an external drive) may not be atomic. The script should handle permission errors gracefully by catching PermissionError and continuing with the remaining files. On Unix systems, renaming a file to a name that differs only in case may behave unexpectedly on case-insensitive filesystems (macOS default, Windows). Adding a warning when –find and –replace would change only case prevents silent failures. For very large directories (100K+ files), using os.scandir() instead of pathlib.iterdir() improves initial listing speed, and batching rename operations in transactions of 1000 files prevents partial failures from leaving the directory in an inconsistent state.

GUI Frontend with Tkinter or PyQt

For users uncomfortable with the command line, a simple GUI frontend provides the same functionality with file dialogs and preview lists. Python’s tkinter (built-in) creates native-looking dialogs for selecting directories, defining rename rules, and previewing changes before applying them. A GUI version shows the original filenames next to the new names with color coding (green = rename, red = conflict, gray = unchanged). Drag-and-drop support lets users drop files or folders onto the window. The PyQt6 version includes a progress bar for large directories, a parallel rename option, and an undo button that reverses the last rename operation.

Empowering Developers for Seamless Collaboration with GitHub Tools

Empowering Developers for Seamless Collaboration with GitHub Tools

GitHub has evolved from a Git hosting service into a comprehensive developer platform offering issue tracking, CI/CD (GitHub Actions), package registry, code scanning, project management, and wiki documentation. These integrated tools streamline the entire software development lifecycle within a single interface, reducing context switching and enabling seamless collaboration for distributed teams.

GitHub Issues and Project Management

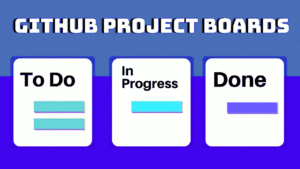
GitHub Issues track bugs, feature requests, and tasks with labels, assignees, milestones, and linked pull requests. The modern issue experience includes issue templates (standardized formats for bug reports and feature requests), issue forms (structured YAML-defined forms with validation), and task lists within issues for tracking sub-tasks. GitHub Projects provides a Kanban-style board that automatically syncs with issues and PRs, supporting custom workflows with status fields, iterations, and insights dashboards. Automations can move cards between columns based on label changes, PR merges, or scheduled dates, reducing manual board management.

# Using GitHub CLI to manage issues
gh issue create --title "Add dark mode" --body "Users have requested a dark theme..."   --label enhancement --assignee @me --project "Q3 Sprint"

gh issue list --label bug --assignee @me
gh issue view 42  # View issue details in terminal

# Link PR to issue automatically (mention in PR description)
# Closes #42 — PR will auto-close the issue when merged

GitHub Actions for CI/CD

GitHub Actions provides workflow automation triggered by GitHub events (push, PR, schedule, issue creation). Workflows are YAML files in .github/workflows/ that define jobs running on GitHub-hosted or self-hosted runners. Each job consists of steps that can run commands or use pre-built actions from the Marketplace. Common workflows include running tests on every push, deploying to cloud platforms on merge to main, publishing packages to npm or Docker Hub on version tags, and scheduled tasks like dependency updates or database backups.

# .github/workflows/ci.yml
name: CI
on: [push, pull_request]
jobs:
  test:
    runs-on: ubuntu-latest
    steps:
      - uses: actions/checkout@v4
      - uses: actions/setup-python@v5
        with: { python-version: "3.12" }
      - run: pip install -r requirements.txt
      - run: pytest --cov=src --cov-report=xml
      - uses: codecov/codecov-action@v4
  deploy:
    needs: test
    if: github.ref == 'refs/heads/main'
    runs-on: ubuntu-latest
    steps:
      - uses: actions/checkout@v4
      - uses: superfly/flyctl-actions@1.5
        with: { args: "deploy" }
        env: { FLY_API_TOKEN: ${{ secrets.FLY_API_TOKEN }} }

Code Review with Pull Requests

GitHub’s pull request interface supports inline code comments, suggested changes (one-click accept), draft PRs (mark work-in-progress without triggering CI), and required reviewers with branch protection rules. Review assignment can be automatic (code owners file, load balancing round-robin). Conversation resolution tracks when comments are addressed. The Checks tab shows CI status directly in the PR. Merge queues (GitHub Merge Queue) automatically test PRs in batches before merging, ensuring main is always green even with concurrent merges. For security-sensitive projects, CODEOWNERS can enforce that specific files require review from designated teams.

Security Features

Dependabot automatically scans dependencies for known vulnerabilities (from GitHub Advisory Database) and creates PRs to update them. Secret scanning detects exposed credentials (API keys, tokens, passwords) in repositories and alerts the security team. CodeQL analysis runs static analysis on every push, finding security vulnerabilities (SQL injection, XSS, path traversal) and code quality issues. SBOM (Software Bill of Materials) generation outputs a machine-readable inventory of all dependencies, helping with supply chain security compliance. These security features, combined with mandatory 2FA enforcement and SAML/SSO for organizations, make GitHub a secure platform for enterprise development teams.

GitHub Actions Advanced Patterns

GitHub Actions supports matrices (running the same job with different OS or language versions), reusable workflows (calling a workflow from another workflow, avoiding duplication), environments (with approval gates and secrets scoped to deployment targets), and composite actions (bundling multiple steps into a reusable action). For monorepos, paths filtering triggers workflows only when specific directories change. The concurrency group prevents duplicate workflow runs on the same branch. Workflow commands allow creating annotations, setting outputs, and updating the job summary from within script steps. Artifact and cache actions speed up builds by persisting dependencies between runs. For self-hosted runners, autoscaling with actions-runner-controller on Kubernetes provides enterprise-level capacity management.

# Matrix testing across Python versions and OS
jobs:
  test:
    strategy:
      matrix:
        os: [ubuntu-latest, macos-latest, windows-latest]
        python: ["3.9", "3.10", "3.11", "3.12"]
    runs-on: ${{ matrix.os }}
    steps:
      - uses: actions/setup-python@v5
        with: { python-version: ${{ matrix.python }} }
      - run: pip install . && pytest

GitHub Pages and Documentation

GitHub Pages hosts static websites directly from repositories, supporting Jekyll, Hugo, and plain HTML. Project pages (served from a gh-pages branch or /docs folder) provide free documentation hosting with custom domain support and automatic HTTPS. Pages integrates with Actions: build your static site generator, deploy the output to Pages, and invalidate the CDN cache automatically. GitHub Wikis provide collaborative documentation that anyone with repository access can edit, with version history and search. For API documentation, GitHub’s support for OpenAPI/Swagger renders specification files directly in the repository view. Combined with the GitHub REST API and GraphQL API, you can automate documentation generation and maintain a project website without leaving the GitHub ecosystem.

Git Basics: From First Commit to Collaboration

Git Basics: From First Commit to Collaboration

Git is the most widely used version control system, tracking changes in files across a distributed network of repositories. Unlike centralized systems (SVN, CVS), Git stores the complete history locally, enabling offline work, fast operations, and flexible branching models. This article covers the essential Git commands and concepts every developer must know.

The Three States and Basic Workflow

Git has three main states for files: modified (changed but not staged), staged (marked for the next commit), and committed (saved to the local repository). The working directory holds modified files, the staging area (index) holds staged changes, and the .git directory stores committed history. The basic cycle is: edit files in the working directory, use git add to stage changes, and git commit to save them to history. git status shows the current state, and git diff shows unstaged changes.

# Initialize a new repository
git init my-project
cd my-project

# Create and commit a file
echo "# My Project" > README.md
git status                    # Shows README.md as untracked
git add README.md             # Stage the file
git commit -m "Initial commit with README"
git log --oneline             # View commit history

Branching and Merging

Branches are lightweight pointers to specific commits. Creating a branch is instantaneous because Git simply creates a new pointer (41 bytes) rather than copying files. The default branch is named main (or master in older repositories). Feature branches isolate work until it is ready. Merging integrates changes from one branch into another—Git either fast-forwards (if there is no divergent work) or creates a merge commit (if branches have diverged). Merge conflicts occur when the same part of a file was modified in both branches and must be resolved manually.

# Branch workflow
git checkout -b feature/login   # Create and switch to new branch
# ... make changes, commit ...
git add . && git commit -m "Add login form"
git checkout main               # Switch back to main
git merge feature/login         # Merge feature into main
git branch -d feature/login     # Delete the feature branch

# Handle a merge conflict
# Edit the conflicted file to resolve
git add resolved-file.txt
git commit -m "Merge feature/login: resolved conflict"

Remote Repositories and Collaboration

Remote repositories (on GitHub, GitLab, Bitbucket) enable collaboration. git clone downloads a remote repository. git push uploads local commits, and git pull fetches and merges remote changes. git fetch downloads remote data without merging, giving you a chance to review changes before integrating. The origin remote is created automatically when cloning. Pull requests (GitHub) or merge requests (GitLab) are code review mechanisms built on top of Git’s branch model—they propose merging a feature branch into main after review and CI validation.

# Working with remotes
git clone https://github.com/user/repo.git
cd repo
git remote -v                   # List remotes
git pull origin main            # Fetch and merge remote changes
git push origin feature-branch  # Push branch to remote

# Undo and amend
git commit --amend -m "Better message"  # Fix last commit message
git reset HEAD~1                 # Uncommit last commit (keep changes)
git reset --hard HEAD~1          # Discard last commit and changes

Ignoring Files and .gitignore

Not all files should be committed—build artifacts (node_modules, target, build/), environment files (.env), IDE settings (.vscode/), and operating system files (.DS_Store) should be excluded via .gitignore. GitHub provides templates for different languages and frameworks. Once a file is tracked by Git, adding it to .gitignore does not stop tracking—you must use git rm –cached to untrack it. Git hooks (pre-commit, pre-push) automate checks like linting, formatting, and running tests before commits or pushes, enforcing code quality standards across the team.

Git Internals: Objects and References

Understanding Git’s internal data model demystifies many Git behaviors. Git stores everything as objects in .git/objects/: blobs (file contents), trees (directory listings mapping filenames to blobs or sub-trees), commits (snapshot pointers with metadata), and annotated tags (named commit references with messages). Each object is identified by its SHA-1 hash (40 hex characters). Branches are simple files in .git/refs/heads/ containing a commit hash—creating a branch is literally writing 41 bytes to a file. The HEAD file points to the current branch or directly to a commit (detached HEAD). When you run git add, Git creates blob objects for the file contents and updates the index (staging area). When you run git commit, Git creates a tree object from the index and a commit object pointing to that tree. Understanding this object model explains why git operations are so fast—they are just file operations on hashed content.

# Exploring Git internals
git cat-file -p HEAD  # Show the current commit object
git ls-tree HEAD      # Show the tree at HEAD
git cat-file -p $(git ls-tree HEAD | grep README | awk '{print $3}')
# This shows the blob content for README at HEAD

Linux Powers Web Evolution

Linux Powers Web Evolution

Linux is the operating system that powers the modern web. From the servers that host websites to the cloud infrastructure that runs SaaS applications, Linux dominates the server market with over 96% market share among the top one million websites. This dominance is not accidental—Linux offers stability, security, flexibility, and cost-effectiveness that proprietary operating systems cannot match for web infrastructure.

The LAMP Stack and Its Legacy

The LAMP stack (Linux, Apache, MySQL, PHP/Python/Perl) has been the foundation of web development for over two decades. Linux provides the operating system layer with robust process isolation, file permissions, and networking. Apache HTTP Server handles HTTP requests with modules for URL rewriting, authentication, load balancing, and SSL termination. MySQL (or MariaDB) stores relational data, and the scripting language generates dynamic content. While modern stacks often replace Apache with Nginx, MySQL with PostgreSQL, and add Node.js, Redis, and Docker, the Linux foundation remains constant.

# Typical LAMP server setup on Ubuntu
apt update && apt install -y apache2 mysql-server php libapache2-mod-php

# Replace Apache with Nginx for better performance
apt install -y nginx php-fpm mysql-server

# Nginx config for a PHP application
server {
    listen 80;
    server_name example.com;
    root /var/www/html;
    index index.php index.html;
    location / {
        try_files $uri $uri/ /index.php?$args;
    }
    location ~ \.php$ {
        include snippets/fastcgi-php.conf;
        fastcgi_pass unix:/var/run/php/php8.1-fpm.sock;
    }
}

Linux as the Cloud Foundation

Every major cloud platform—AWS, Google Cloud, Azure, DigitalOcean, Linode—runs Linux as the primary operating system for their virtual machines and container services. AWS’s EC2 instances, Google Compute Engine VMs, and Azure Virtual Machines all support Linux images that boot in seconds and scale to thousands of cores. Linux’s container story is unmatched: Docker runs natively on Linux using kernel namespaces and cgroups, and Kubernetes orchestrates containers at scale across clusters. The entire cloud-native ecosystem (Terraform, Prometheus, Grafana, Envoy, etcd) runs on Linux first.

# Install Docker on Linux
apt install -y docker.io docker-compose-v2
systemctl enable --now docker

# Run a containerized web app
docker run -d --name myapp -p 8080:80 nginx:alpine

# Deploy with Kubernetes (minikube for local testing)
kubectl create deployment web --image=nginx:alpine
kubectl expose deployment web --port=80 --type=LoadBalancer

Security and Reliability Advantages

Linux’s security model—discretionary access control, user/group permissions, capability-based security, and mandatory access control via SELinux or AppArmor—provides defense in depth for web applications. Regular security updates through package managers (apt, yum) and the ability to apply kernel live patches without rebooting minimize downtime. The principle of least privilege is built into the system: web servers run as the www-data user with limited permissions, and systemd sandboxing restricts service capabilities. Linux servers with proper configuration have uptimes measured in years, and the modular kernel allows loading only the drivers and modules needed for the specific workload.

The DevOps Ecosystem

Linux is the native environment for DevOps tooling. CI/CD pipelines (Jenkins, GitLab CI, GitHub Actions) run on Linux agents. Configuration management (Ansible, Puppet, Chef) targets Linux servers. Infrastructure as code (Terraform, Pulumi) provisions Linux resources. Monitoring and observability (Prometheus, Grafana, ELK Stack) are Linux-native. The terminal-centric culture of Linux enables automation through shell scripts, cron jobs, and systemd timers. For web developers, understanding Linux—file permissions, process management, systemd units, network configuration, and package management—is not optional; it is essential for deploying and operating web applications in production.

Server Hardening Best Practices

Securing a Linux web server requires multiple layers: fail2ban blocks IPs after repeated failed SSH login attempts; unattended-upgrades installs security patches automatically; UFW or iptables restricts ports to only what is needed (22/SSH, 80/HTTP, 443/HTTPS); SSH key authentication replaces passwords; and regular log review (journalctl, /var/log/auth.log, /var/log/nginx/access.log) detects intrusion attempts. The CIS Benchmarks provide detailed hardening guidelines for each Linux distribution. SELinux (CentOS/RHEL) or AppArmor (Ubuntu/Debian) enforces mandatory access control policies that limit what compromised processes can access, providing defense in depth. Regular vulnerability scanning with tools like Lynis or OpenVAS identifies configuration weaknesses before attackers do. A hardened Linux server, properly configured and maintained, can run for years without security incidents even when exposed to the open internet.

Linux Distribution Choices for Web Servers

Ubuntu Server LTS (released every two years in April) is the most popular Linux distribution for web servers, offering a balance of stability and up-to-date packages. Debian Stable prioritizes stability above all else—packages are older but thoroughly tested. CentOS Stream tracks between Fedora and RHEL, suitable for enterprise environments requiring RHEL compatibility without a subscription. Alpine Linux, at under 5 MB base install size, is the most popular Docker base image—its musl libc and busybox utilities produce minimal attack surfaces and fast build times. For ARM-based servers (AWS Graviton, Raspberry Pi), Ubuntu Server and Debian offer excellent ARM support. All these distributions share the Linux kernel and GNU tools, so skills transfer between them.

Python Packaging and Distribution with Poetry

Python Packaging and Distribution with Poetry

Packaging a Python project properly ensures that other developers can install, use, and contribute to your code without dependency conflicts or missing files. Poetry is a modern dependency management and packaging tool that simplifies the entire workflow — from project creation to publishing on PyPI. Unlike pip and setuptools, Poetry uses a declarative pyproject.toml file, resolves dependencies with a SAT solver to avoid version conflicts, and generates deterministic installs via a lock file. This article walks through creating, building, and publishing a Python package with Poetry.

Creating a New Project

Starting a new project with Poetry is a single command. It creates the directory structure, initializes a Git repository, and generates a pyproject.toml file with sensible defaults. The generated structure includes a source directory named after your project, a README.md, and a tests directory.

# Create a new Poetry project
poetry new my-project
cd my-project

# Project structure created:
# my-project/
#   pyproject.toml
#   README.md
#   my_project/
#       __init__.py
#   tests/
#       __init__.py
#       test_my_project.py

If you are adding Poetry to an existing project instead of starting fresh, run poetry init and answer the prompts. Poetry will generate a pyproject.toml based on your existing requirements.txt or setup.py if you point it at the right files.

Managing Dependencies

Poetry uses a pyproject.toml file (defined in PEP 518 and PEP 621) to declare project metadata and dependencies. Dependencies are organized into groups: the main [tool.poetry.dependencies] section for runtime dependencies, and [tool.poetry.group.dev.dependencies] for development-only packages like test runners, linters, and type checkers. When you run poetry add, Poetry automatically resolves all dependency versions to ensure compatibility and records the exact versions in a poetry.lock file. This lock file should be committed to version control so that everyone working on the project gets identical dependency trees.

[tool.poetry]
name = "my-project"
version = "0.1.0"
description = "A sample Python project"
authors = ["Your Name <you@example.com>"]
readme = "README.md"
license = "MIT"

[tool.poetry.dependencies]
python = "^3.10"
requests = "^2.28"
click = "^8.1"

[tool.poetry.group.dev.dependencies]
pytest = "^7.0"
black = "^22.0"
mypy = "^1.0"
ruff = "^0.1"

[build-system]
requires = ["poetry-core"]
build-backend = "poetry.core.masonry.api"

The ^ operator in version constraints means “compatible with.” For example, ^2.28 allows any version from 2.28 up to but not including 3.0.0. This gives you bug fixes and minor features without risking breaking changes from a major version bump. The python = "^3.10" constraint means your package supports Python 3.10, 3.11, 3.12, etc., but not Python 4.0.

Adding and Removing Dependencies

The Poetry CLI provides intuitive commands for managing dependencies. Each command updates both pyproject.toml and poetry.lock automatically, ensuring your environment stays synchronized with the declared dependencies.

# Add runtime dependencies
poetry add fastapi uvicorn

# Add development-only dependencies
poetry add --group dev mypy pytest-cov

# Remove a dependency
poetry remove requests

# Update all dependencies to latest allowed versions
poetry update

# Show dependency tree
poetry show --tree

# Export to requirements.txt format
poetry export -f requirements.txt --output requirements.txt

The poetry show --tree command is invaluable for debugging dependency conflicts — it displays a tree of every package and its sub-dependencies, making it easy to spot situations where two packages require incompatible versions of the same library.

Building and Publishing

Once your project is ready, building distributable archives is a single command. Poetry produces both a source distribution (.tar.gz) and a wheel (.whl) in the dist/ directory. Wheels are the preferred distribution format because they install faster — they are pre-built and do not require running setup.py. Publishing to PyPI is equally simple. You will need a PyPI API token for authentication instead of a username and password.

# Build source distribution and wheel
poetry build

# Publish to PyPI
poetry publish --username __token__ --password pypi-xxxxxxxxxxxxxxxxxxxx

# Publish to Test PyPI first (recommended)
poetry config repositories.testpypi https://test.pypi.org/legacy/
poetry publish -r testpypi --username __token__ --password pypi-xxxx

Version Management

Poetry includes a built-in version command that follows semantic versioning conventions. It updates both the pyproject.toml version field and creates a Git tag.

# Check current version
poetry version

# Bump version (patch, minor, major, prepatch, preminor, premajor)
poetry version patch   # 0.1.0 -> 0.1.1
poetry version minor   # 0.1.0 -> 0.2.0
poetry version major   # 0.1.0 -> 1.0.0

# Pre-release versions
poetry version prepatch  # 0.1.0 -> 0.1.1a0

By integrating Poetry into your workflow, you get reproducible builds, clean dependency resolution, and a straightforward publishing pipeline — all essential for maintaining a professional Python package.

Publishing to PyPI and CI/CD Integration

Once your package is configured with Poetry, publishing to PyPI is a single command: poetry publish. For automated publishing, configure PyPI tokens as CI/CD secrets. A GitHub Actions workflow can run tests, build with poetry build, publish to TestPyPI on PR merges, and publish to PyPI on version tags. Poetry’s version command (poetry version patch/minor/major) bumps versions according to semantic versioning. The pyproject.toml build-system requires poetry-core ensures pip can install directly from the repository. Poetry’s dependency resolver avoids version conflicts that plague setuptools/pip projects.

Mastering the Command Line Interface (CLI): Exploring Bash, Terminal, Command Prompt & PowerShell

CLI stands for Command Line Interface, which is a way of interacting with a computer program or operating system through a text-based interface rather than a graphical user interface (GUI). A CLI allows users to enter commands into a command prompt or terminal window to perform tasks such as navigating the file system, running programs, and configuring system settings.

Bash, Terminal, Command Prompt, and Power Shell are all examples of command-line interfaces used in different operating systems.

Bash (Bourne-Again SHell) is a popular shell program that is commonly used on Linux and other Unix-based operating systems. It provides a command-line interface for executing commands, running scripts, and manipulating files and directories. Some useful features of Bash are:

  1. Scripting Capabilities: Bash is a powerful scripting language that allows for automation and the creation of complex scripts and programs.
  2. Availability: Bash is pre-installed on most Linux and Unix-based systems, making it readily available for use.
  3. Customizability: Bash can be customized to meet the needs of the user with the use of scripts, aliases, and configuration files.
  4. Interoperability: Bash can work with a wide range of command-line tools and utilities, making it compatible with many different systems and applications.
  5. Flexibility: Bash can be used for a variety of tasks, from simple one-liner commands to complex shell scripts.

Bash is a powerful and flexible command-line interface and scripting language, but its complexity and limitations may make it challenging for some users. Some of these challenges are:

  1. Steep Learning Curve: Bash can be difficult to learn for beginners, due to its syntax and many different commands and utilities.
  2. Limited Graphical Capabilities: Bash is primarily a command-line interface and does not have strong graphical capabilities, which can be limiting for certain tasks.
  3. Security Risks: Bash scripts and commands can potentially introduce security risks if not properly written or managed.
  4. Platform Dependence: While Bash is available on most Linux and Unix-based systems, it may not be available on other operating systems, which can limit its portability.
  5. Limited Interactivity: Bash is primarily used for running commands and scripts and may not be as interactive or user-friendly as other interfaces for certain tasks.

Terminal is a command-line interface that is used on Apple’s macOS operating system. It provides a window where users can enter commands and interact with the operating system. In many Linux distros CLI application has the name ‘Terminal’. While the names of the terminal applications may be the same on Linux and MacOS, there are differences in the way they function as underlying operating systems are not same. Linux terminal is usually Bash, while the default shell used in the macOS terminal is Zsh. Many of the command-line tools and utilities available in the Linux terminal are also available in the macOS terminal, there may be some differences in the versions or implementations of these tools

Command Prompt is a command-line interface that is used on Microsoft Windows operating systems. It provides a window where users can enter commands to perform tasks such as navigating the file system, running programs, and configuring system settings.

Power Shell is also a command-line interface developed by Microsoft for modern Windows operating systems. It provides an extensive scripting language and can be used to automate administrative tasks and system configuration.

While Cmd(Command Prompt) and PowerShell are both command-line interfaces used in Windows operating systems. There are some key differences between the two:

  1. Functionality: PowerShell is more powerful and feature-rich than Cmd, with support for advanced scripting and automation tasks. PowerShell also has access to .NET Framework libraries, allowing for more advanced scripting capabilities.
  2. Syntax: PowerShell uses a different syntax than Cmd, using cmdlets (short for “command-lets”) instead of traditional commands. Cmdlets are structured in a verb-noun format, making it easier to remember and use them.
  3. Command Support: PowerShell supports most of the commands available in Cmd, but also has its own set of unique commands. Cmd does not have access to many of the advanced features available in PowerShell.
  4. Output Formatting: PowerShell has more flexible output formatting options, allowing users to easily customize and filter output data. Cmd has limited output formatting capabilities.
  5. Cross-Platform Support: PowerShell is cross-platform, with versions available for Windows, Linux, and macOS. Cmd is only available on Windows operating systems.
  6. Learning Curve: PowerShell has a steeper learning curve than Cmd, due to its more complex syntax and advanced features.

While these CLI tools have different names and are used on different operating systems, they all provide similar functionality in terms of allowing users to enter commands to interact with the operating system and perform various tasks.

An interesting practical example to see the similarity and differences between these popular CLIs is the command to change the encoding of a file to ‘UTF-8’.

In Bash (on Linux or Unix-based systems) the command is iconv and has following syntax:

iconv -f [source_encoding] -t UTF-8 [input_file] > [output_file]

For example, to convert a file encoded in ISO-8859-1 to UTF-8 using Bash:

iconv -f ISO-8859-1 -t UTF-8 input.txt > output.txt

In Terminal (on macOS) the name of command is same but syntax is slightly different:

iconv -f [source_encoding] -t UTF-8 -o [output_file] [input_file]

For example, to convert a file encoded in ISO-8859-1 to UTF-8 using MacOS Terminal:

iconv -f ISO-8859-1 -t UTF-8 -o output.txt input.txt

On Command Prompt (on Windows) the command is ‘chcp’ and its syntax is:

chcp [code_page_number] & type [input_file] > [output_file]

For example, to convert a file encoded in ANSI (Windows-1252) to UTF-8 the command is:

chcp 1252 & type input.txt > output.txt

Power Shell (on Windows):

Get-Content -Path [input_file] -Encoding [source_encoding] | Set-Content -Path [output_file] -Encoding UTF8

For example, to convert a file encoded in ANSI (Windows-1252) to UTF-8 in Power Shell the command is:

Get-Content -Path input.txt -Encoding Default | Set-Content -Path output.txt -Encoding UTF8

Shell Scripting and Automation

The command line is the most productive interface for system administration, development workflows, and data processing. Essential commands include: ls (list files), find (search files by name/type/size), grep (search content), awk (text processing), sed (stream editing), chmod (permissions), ps (process status), top/htop (resource monitoring), and ssh (remote access). Combining commands with pipes (|) creates powerful one-liners: ps aux | grep python lists Python processes; find . -name “*.py” | xargs wc -l counts lines in all Python files. Shell scripts (.sh files) automate repetitive tasks with variables, conditionals, loops, and functions. Learn to use tab completion, command history (Ctrl+R for reverse search), and job control (Ctrl+Z to suspend, fg/bg to resume). The command line is not optional for professional developers—every deployment, debugging session, and data pipeline relies on CLI proficiency.

# One-liner to find largest files
find /var/log -type f -size +100M -exec ls -lh {} \; | sort -k5 -hr

# Count unique IPs in access log
awk '{print $1}' /var/log/nginx/access.log | sort | uniq -c | sort -rn | head -10